The example below demonstrates how to use Kustomize for a minimal Kubernetes deployment that deploys resources to a development and production environment.
Prerequisites
You will need an existing Kubernetes cluster (version 1.14+) with the kubectl CLI installed.
Use the command below to clone the example Git repository and download the required manifests into your working environment:
$ git clone https://github.com/ssengupta3/kustomize-demo
A successful clone operation will display the response below:
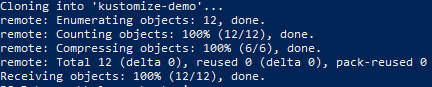
The expected response to our clone command
> Note: The repository we’re using already contains the base and overlays folders, including the required resource manifests and customization files.
Once the resource manifest and files are cloned, navigate to the manifests folder using the command below:
$ cd kustomize-demo
Then to the base folder:
$ cd base
Apply the configurations:
$ kubectl apply -k .
You should then see that the resources were successfully created via the response below:
service/darwin created
deployment.apps/darwin created
> Note: The `-k` or `--kustomize` flag is used by kubectl to recognize Kustomize. resources. The base folder contains a deployment.yaml and service.yaml file that Kustomize uses to create shared resources.
As before, navigate to the `/overlays/dev` folder and apply the config, as shown:
$ kubectl apply -k .
service/dev-darwin created
deployment.apps/dev-darwin created
Repeat the same step on the` /overlays/prod` folder to apply the configuration:
$ kubectl apply -k .
service/prod-darwin created
deployment.apps/prod-darwin created
> Note: This builds different resources in the production and development environments. Kustomize appends the names of each resource with the value provided in the namePrefix specification of each kustomization.yaml file.
Now we will push a small change to each environment, demonstrating how Kustomize uses base manifests to apply environment-specific changes. In our example, we’ll specify a different number of replicas for Dev and Prod.
Verify the creation of resources by checking for new cluster services and deployments, like so:
$ kubectl get deployments
NAME          READY   UP-TO-DATE   AVAILABLE   AGE
darwin        1/2     2            1           11m
dev-darwin    1/2     2            1           47s
prod-darwin   1/2     2            1           18s
$ kubectl get services
NAME          TYPE        CLUSTER-IP      EXTERNAL-IP   PORT(S)   AGE
darwin        ClusterIP   10.105.74.59    <none>        80/TCP    11m
dev-darwin    ClusterIP   10.103.2.12     <none>        80/TCP    65s
kubernetes    ClusterIP   10.96.0.1       <none>        443/TCP   9d
prod-darwin   ClusterIP   10.110.53.253   <none>        80/TCP    36s